Create Sessions
Once an event is created, the next step is to create a some sessions. These are generated using "schedules" which create one or more sessions based on a particular frequency or pattern.
An example of a schedule is “6pm – 10pm” every Saturday, for 3 weeks. Using a combination of multiple schedules, you can create any number of sessions for your event.
Another example may be, if your event has a Morning 9am, Midday 12pm and Afternoon 3pm event, daily, for the period of 30 days. You will need to create 3 Schedules for each of the following; Morning 9am, Midday 12pm and Afternoon 3pm.
To Create a Schedule and Sessions:
- Select “Sessions” on the image above, or on the left hand side menu.
- Enter a descriptive Schedule Name to assist you in identifying the schedule eg. "Mornings 9am"
- Select your Schedule Type – this is how often you would like the Schedule to occur eg. Once-off, Daily, Weekly
- Enter the Start Time eg. 9:00am
- Enter the End Time eg. 11:30am
- Select when each session in your Schedule ends – Same Day, Next Day, 2nd Day etc. In most cases the end time for each session will be on the same day.
- Enter the Date your Schedule begins eg. 01 June 2020
- Enter the Date your Schedule ends eg. 30 June 2020
- Select “Create Sessions”. The system will automatically calculate how many sessions are to be created in this schedule. Please ensure this number is correct before proceeding.
Repeat the steps above for each Schedule you require by selecting “Add More Sessions”, until the desired sessions for your event have been created.
To view all available sessions in chronological order:
- Select the header “Group By Date”, ensuring it is highlighted light blue
- To view the Sessions for each date select the arrow “>” to expand session times.
- Clicking the on the blue
details button will show the sales for a particular session, and the red X button will delete a session. Please note that a session cannot be deleted if there are completed or in-progress transactions for that session.

To View your Schedules:
- Select the header “Group By Schedule”, ensuring it is highlighted light blue
- Here you will be able to view or delete your Schedules eg. Morning 9am, Midday 12pm. There is an additional notes section here where you can put notes against each schedule to give assist with keeping track of the reason a particular schedule was created.
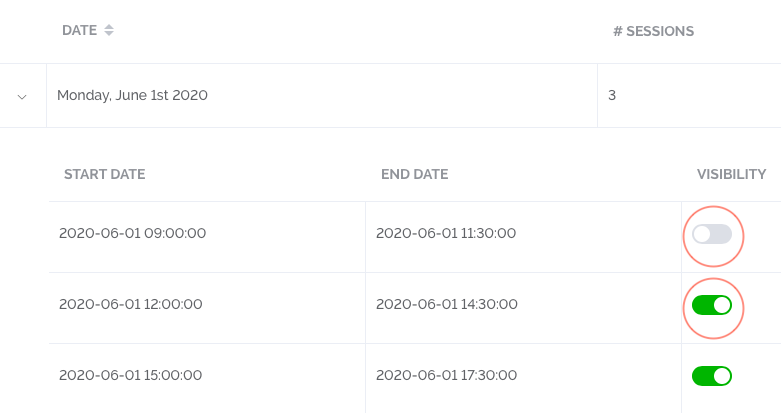
To Hide or Stop sales for a particular session:
- Select the header “Group By Date”, ensuring it is highlighted light blue
- Select the arrow “>” to view the dropdown with session times
- Select the toggle under the header “Visibility” making it Green for visible and Grey for invisible. This will stop the session from appearing to customers during checkout, but will not delete the session from the system.